Tuesday, December 30, 2014

Meatball Bubble Up Bake

 I just had to share this scrumptious (and simple) recipe!!! My family happily gobbled up the "Meatball Bubble Up Bake" along with some roasted veggies and fruit this evening. This recipe is the perfect substitute whenever you are craving Italian or if you need an easy family pleasing casserole. 
It only requires 4 ingredients and takes minutes to put together. The simplicity of this meal makes it perfect for a hectic weeknight. We will definitely add this recipe to the rotation. 
Meatball Bubble Up Bake

1 can (16 oz.) of 8 biscuits ~ Pillsbury Grands Biscuits
1 small bag frozen meatballs (I used 35 Italian-style meatballs)
1 jar (24 oz.) spaghetti sauce
2 cups shredded Mozzarella cheese

Preheat the oven to 375 degrees. Cut each biscuit into 8 pieces and place into greased 9 x 13 inch dish.  Pour spaghetti sauce over all of the biscuits and stir to coat. Place the meatballs evenly across the top of the biscuits. Sprinkle Mozzarella cheese over the entire top of the casserole.  Bake for 35 to 40 minutes.  

Monday, November 10, 2014

BEST EVER CORNBREAD

As the weather shifts to cooler temperatures I automatically add more soups and stews to my dinner rotation. Last week I was craving slow simmered beans & ham along with a side of cornbread.  I scanned through my recipe boxes and found this newspaper clipping for "Moist Cornbread". I can't remember how long I've had this recipe but I was so happy to have discovered it again! This truly creates the best moist cornbread ever!!
What also makes this recipe amazing is the simple ingredients…..you don't have to worry about measuring out cornmeal..etc..….simply combine it all into one bowl and you are done! With my hungry family of five, it is also nice to have enough portions that you'll have leftovers for the next day.  This recipe is made in a 9 x 13 inch pan so there is plenty to go around!
BEST EVER CORNBREAD

2 boxes Jiffy Corn Muffin Mix
1 (16 oz.) can creamed corn
1 cup sour cream
3 eggs
1 stick (1/2 cup) melted butter 
1 teaspoon salt

Mix all ingredients together in a large bowl and then pour into a greased 9 x 13 inch baking dish.  Bake at 375 degrees for 35 minutes or until lightly brown.  
I served the warm cornbread along with crockpot bean & ham soup. To make the bean soup, simply purchase a bag of dried 15 beans along with 1-2 lbs of ham(diced, pieces or a ham hock), 1 onion and 1 can of diced tomatoes; follow the directions on the back of the 15 bean bag and soon you will be able to enjoy the same belly warming comfort food on a cold evening! If you place the soup into a crockpot to simmer for several hours, you'll only need to bake the cornbread right before dinnertime.  This cornbread is super easy and tastes so moist….not dry and crumbly like other recipes. This will be my go to cornbread from now on!!! Enjoy!!!

Monday, November 3, 2014

3 Ingredient Banana Bread


Just like most families we tend to cumulate ripened bananas quite often. I should get into a habit of placing bananas into my freezer to save for later….but instead I stare at the bananas slowly decaying on my counter and think daily about how I should use them to make banana bread.  Since I've tried numerous banana bread recipes over the years I can never quiet remember which recipes were worth making over again or not. At times I've also felt lazy when I think about the process of measuring out the flour, sugar, etc…. 
When I came across this recipe on Pinterest for an easy bread that only takes 3 ingredients I knew that I had to try it!!! Skipping the step of measuring ingredients and just simply dumping out a box of cake mix is definitely the way to go…..especially on the busy nights when we have so much going on. 
3 Ingredient Banana Bread

1 (15.25 oz.) box yellow cake mix
3-4 overripe bananas, sliced & smashed
2 eggs

Preheat the oven to 350 degrees. Stir all ingredients in a large bowl until well combined. Divide the batter equally into two (Pam sprayed) small loaf pans or one large loaf pan.  Bake for at least 40 minutes or until a knife inserted into the center comes out clean.  


Options: You could also add 1/2 cup of chocolate chips to the batter or even a thin layer of cream cheese to the top. For the cream cheese layer: I simply mixed together 3 Tablespoons sugar with 4 ounces softened cream cheese in a small bowl.  I spread the cream cheese along the top of the two loaf pans; then used a butter knife to swirl the cream cheese layer into the batter and baked as directed. 
On this day, I decided to take it up a notch and added a thin layer of sweetened cream cheese; but the banana bread is yummy and moist on its own without any extra additions. It is so nice to have a recipe that you only have to occasionally grab a box of yellow cake mix at the grocery store and then of course everyone has extra bananas laying around their kitchen…..(or at least in my house). Enjoy this delicious treat warm out of the oven or the next day for breakfast with a hot cup of coffee. 


Monday, October 27, 2014

Easy Italian Bake

So excited to share this delicious recipe with you! It comes together easily to create a scrumptious dinner perfect for company or a busy weeknight. I took a quick picture of the ingredients before cooking but accidentally forgot to include the cream cheese…oops! 
Easy Italian Bake

4 cups bowtie pasta (or any type of noodle)
1 pound mild Italian Sausage
2 (8 oz.) cans tomato sauce
1/2 teaspoon Italian Seasoning
4 oz. cream cheese, softened and cubed
2 (5 oz.) cans Evaporated Milk
1/2 teaspoon Garlic Salt
 2 cups shredded Mozzarella cheese

Cook noodles in boiling water in a saucepan according to directions on the box.  In the meantime, cook Italian Sausage in a medium skillet until no longer pink; then stir in tomato sauce and Italian Seasoning….simmer on low heat.  Drain noodles and then return back into saucepan. Add cream cheese, evaporated milk and garlic salt to the noodles. Turn heat on low and stir until cheese melts and sauce begins to thicken.  Pour noodle mixture into a greased 9 x 13 inch casserole pan. Spread tomato meat mixture over the top. Sprinkle 2 cups (or more) of Mozzarella cheese on top. Bake at 350 degrees for 12 to 18 minutes or until cheese is melted and casserole is bubbly. 
The delicious smell of the Italian Sausage, tomato sauce and cheesy noodles fills up the entire kitchen! I served this casserole along with a slice of Texas toast, a side of steamed broccoli and fresh fruit.  Everyone enjoyed this Italian dinner and several family members asked for seconds.  This recipe could easily be made with whatever noodles you have in your pantry…such as penne or even spaghetti.  You could also use regular ground beef (or ground turkey) instead of the Italian Sausage. Your family will happily devour this "Easy Italian Bake"!!!!


Monday, October 6, 2014

Breakfast Sausage Casserole


This past weekend my family was busy with a Friday night football game, early Saturday morning soccer game, robotic league practice, local chili cook off and visiting relatives in town. Needless to say I was in need of an easy but satisfying breakfast to gear everyone up for a non-stop day ahead. After looking back at casserole recipes that I've made in the past I decided to pick this one. A simple glance at the ingredients lets you know that the basic food combination guarantees a breakfast that everyone will love!


Breakfast Sausage Casserole

1/2 loaf of sliced white loaf bread
1 pound fresh bulk pork sausage with sage
10 ounces sharp Cheddar, grated
2 cups half-and-half
1 teaspoon dry mustard
1 teaspoon salt (I recommend using 1/2 tsp. or less)
5 large eggs, lightly beaten

Cut the bread into 1-inch cubes and spread in the bottom of a greased 9 x 13 inch casserole dish.  In a medium skillet, brown the sausage over medium heat until fully cooked and no longer pink. Remove the sausage with a slotted spoon to drain the fat.  Spread the cooked sausage over the bread and top with the cheese.  Then stir together the half-and-half, dry mustard, salt and eggs in a small bowl.  Pour this mixture over the cheese. Cover the casserole with aluminum foil and refrigerate for 8 hours or overnight.  The next day, preheat the oven to 350 degrees. Bake the covered casserole  until set and slightly golden, about 50 minutes. Remove from the oven and allow the casserole to set for 15 minutes before serving. 


So the next time you need a delicious breakfast casserole try this recipe and serve along with a side of fresh fruit. You could easily substitute cooked diced bacon instead of the sausage or even leave the meat out all together. If your family enjoys a veggie version than just add finely diced onions, green peppers or mushrooms. This recipe is guaranteed to impress your guests and provides the perfect warm meal to start your day!!!

Monday, September 15, 2014

Chicken and Stuffing Casserole

It is always nice to have recipes in your collection that everyone loves!! This is the perfect dish to deliver to the new mom or to bake for dinner whenever your out of town family is visiting. It creates a heaping oversized meal in a 9 x 13 inch pan. It combines all of your favorite flavors just like an old-fashioned Thanksgiving! It is so easy to make and sure to please your entire family!
Chicken and Stuffing Casserole

5 large chicken breasts (I used frozen)
14 oz. package Pepperidge Farm Stuffing
2 cans cream of chicken soup
1 (8 oz.) container sour cream
1 to 2 cups water (use less if you like a thicker sauce)
salt & pepper to taste

Preheat oven to 325 degrees. In a large pot, boil chicken breasts until done and then chop into bite sized pieces. Prepare stuffing according to package directions. (Optional: add diced onion & diced celery to the stuffing) Place stuffing on the bottom of a buttered 9 x 13 inch baking dish. Spread chicken on top of stuffing. In a separate bowl, combine both cans of soup, sour cream and water. Pour over the chicken. Bake uncovered for 40 minutes until the edges start to bubble. (Salt and pepper to taste)

You must try this delicious chicken with the rich gravy and savory stuffing!  The next time I bake it I'm going to try placing each serving on top of a thick slice of buttered texas toast…yum!  It is also a great recipe to remember when you want to eat your leftover Thanksgiving turkey meat! It would be great paired along with your favorite sides such as mashed potatoes, green beans and warm rolls. Definitely a recipe that will be on my family's "make again" list!!

Tuesday, September 9, 2014

Crockpot Beef Stroganoff

I originally found this recipe by searching Pinterest for crockpot meals. I've tried different versions of this meal over the years so when I saw a recipe listed as the "Best Beef Stroganoff" then I knew I had to try it! I changed the recipe around a little but overall I thought it turned out pretty well. The ingredients all came together to create a rich satisfying meal that the whole family enjoys!
Crockpot Beef Stroganoff

2 packages of cubed stew meat
2 cans condensed Golden Mushroom Soup
1 can Beef Broth 
1 small onion, diced
1 (8 oz.) package of fresh sliced mushrooms
3 Tablespoons Worcestershire sauce
1 (8 oz.) package of cream cheese, cubed
1  small container sour cream, for garnish
1 package egg noodles

Place the meat into a Pam sprayed crockpot. Add the soup, broth, diced onion, mushrooms and Worcestershire sauce. Stir to combine and then cook on LOW for 6 to 8 hours. One hour before serving turn crockpot heat to HIGH and add the cream cheese. Stir, cover with the lid and let cook until the cream cheese is melted and blended in with the sauce.  Serve over cooked egg noodles or mashed potatoes with a dollop of sour cream on top!
This recipe makes plenty of yummy beef gravy to pour over the noodles. My kids loved this meal and asked for seconds "with extra sauce" over everything. We even had enough beef stroganoff left over to use as a quick reheated lunch the next day. As the cooler months start to roll in…add this recipe to your collection for the perfect fall meal!

Wednesday, August 20, 2014

Crockpot Cheesy Chicken


Everyone loves a tasty crockpot recipe!!! I've made so many different versions of frozen chicken breasts in a crockpot that I've lost count. Sometimes you just have to go back to the basics and good ol' comfort food. This is the type of recipe that our entire family loves and is a no brainer to throw together on a busy day.  Add these ingredients to your next grocery list for an easy yummy crockpot dinner!!!


Crockpot Cheesy Chicken

1 lb frozen chicken breasts (5 or 6 breasts)
2 cans cream of celery soup
1 small can diced green chiles
1 block Monterey Jack Cheese, shredded
salt, pepper & garlic powder, to taste

Spray non-stick spray (Pam) inside crockpot.  Place frozen chicken breasts on bottom of crockpot and then pour both cans of soup and can of chiles on top. Cook on low heat for 6 hours.  Use a fork and knife to lightly shred the chicken inside the crockpot. Sprinkle a few dashes of salt, pepper and garlic powder, if desired.  Add the shredded cheese, stir and cook for another 5 minutes. Serve over cooked rice. 


Tuesday, August 19, 2014

Sausage Pasta Skillet

The past few months have been a time of many changes for my family….. my husband just recently retired after serving 20 years in the Air Force, my three kids started back at school and I went back to work as a Speech Pathologist in a school district working with kids ages 3 to 18 years. Needless to say our schedule remains busy…and it will go into fast forward as the Fall soccer season begins and the kids attend weekly dance classes, cub scouts, music lessons, etc…
 As my family knows I'm constantly on the lookout for "new" recipes. I especially love those easy one skillet dinners that require little clean-up and come together quickly. I was thrilled to see this recipe posted by the website Kevin and Amanda. (The original recipe is from the cookbook The Best Simple Recipes by America's Test Kitchen.)  It had all of the basic ingredients for a yummy but fast meal. I adapted it to my own tastes but for the most part it is a definite keeper!!! 

Sausage Pasta Skillet
adapted from kevinandamanda.com's recipe for Spicy Sausage Pasta

1 Tablespoon olive oil
1 lb. smoked sausage, sliced 
1 1/2 cups diced onions (I left this out)
1 1/2 teaspoons crushed garlic
1 (14.5 oz.) can chicken broth
1 (10 oz.) can Ro-Tel, Mild (or use 1 (14.5oz.) can diced tomatoes if you like it less spicy)
8 oz. penne
1/2 cup heavy cream
salt & pepper to taste
2 cups Monterey Jack cheese, shredded
green onions, thinly sliced (optional)

Add olive oil and sliced sausage (and diced onions if you like) to a large skillet and cook over medium heat until lightly browned, about 5 minutes.  Add garlic, broth, tomatoes, penne, heavy cream, salt and pepper; stir. Bring to a boil; cover skillet with a lid and reduce heat to medium-low. Simmer until pasta is tender; about 15 minutes.  Remove skillet from heat and stir in 1 cup Monterey Jack cheese.  Then add the remaining 1 cup of cheese evenly across the top of the skillet right before serving.  Makes 4 servings. 


My family ate every last bite of this skillet meal and agreed this is a tummy pleaser. The next time I make it I will definitely use a can of diced tomatoes….I liked the extra kick but it was a little too much for my youngest son.  You can also play around with the sausage by using turkey sausage or a lite version of smoked sausage.  The pasta can also be swapped out with whatever type of pasta you have available in the pantry.  Add this recipe to your weeknight rotation for an easy skillet meal the whole family will enjoy!!!


Saturday, July 26, 2014

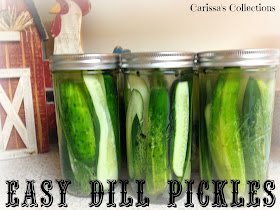
Easy Dill Pickles


My family loves pickles….of any kind!!! I'm pretty sure that all three of my kids have inherited their "sour" cravings from me.  I can trace my pickle-loving habit all the way back to when I was a little girl…..my grandmother made the best pickled okra! She always had an abundance of jarred okra every summer and was more than happy to share. 

There has been a big resurgence lately in home canning. I've been amazed by the large amount of supplies, pre-made mixes and vintage glass jars that are now available at local stores.  Even though I'm highly fascinated by the unique skill of "old fashioned" canning, I usually don't have the extra time that it involves.  When I came across this recipe for refrigerated pickles, I knew it would be the perfect quick way to get that yummy fresh pickle taste….with little effort.

Of course this recipe is so simple that my nine year old daughter was able to jump right in and help. Her favorite part was stuffing the sliced cucumbers into the glass jars and mixing up the brine.  I adapted the recipe by using fresh sprigs of Dill and also minced garlic. I also left out the red pepper flakes since I knew my kids would be the first to devour the pickles. 
I purchased (from the canning section in Wal-Mart) a set of 9 "Pint & Half" Ball Jars. I thought this would be the perfect size to fit the length of the pickling cucumbers and have a good amount of pickle servings per jar. (It averaged out to be around 10 spears in each jar.) One of the best things about these jars is the ability to wash them when you are done and reuse them for the next batch of pickles!!! It is a never ending cycle in our home!

Easy Dill Pickles
adapted from Kansas City Mamas

12 pickling cucumbers, sliced into fourths
5 tsp crushed garlic (or 5 peeled garlic cloves)
2 1/2 tsp black peppercorns
fresh Dill (at least 5-6 sprigs)
(Optional: add 1/4 tsp onion flakes and 1/4 tsp mustard seeds to each jar)

Brine: 
6 tbsp kosher salt
4 tbsp sugar
2 1/2 cups distilled white vinegar

Place 1 tsp garlic, 1/2 tsp peppercorns and 1 sprig of fresh Dill (or 1/4 tsp dried dill) at the bottom of five (pint & half) jars. Divide sliced cucumbers evenly into each jar. In a medium sized bowl or Pyrex measuring glass, mix together 6 tbsp salt, 4 tbsp sugar and 2 1/2 cups distilled white vinegar. Microwave until it comes to a boil 3-4 minutes. (Or bring to a boil in a medium saucepan) Mix together until the sugar and salt are dissolved.  Then add 4 cups of water and mix well. Pour mixture over cucumbers until all of the cucumbers are submerged.  Place lids on jars and screw tightly. Place into the refrigerator overnight. Pickles will be ready to eat the next day and should last for up to a month. 

I made this batch of pickles for the 4th of July holiday so I added a little festive ribbon to the top of the jars.  They made great gifts for my friends and family. We all enjoyed these perfectly seasoned crisp pickles with our potluck barbecue. You can leave them in spears or slice them into rounds to add to sandwiches. Either way these "Easy Dill Pickles" will not last long!!!

Sunday, June 8, 2014

Bacon Wrapped Stuffed Jalapeños


 So excited to share this recipe on my blog!!! If you have seen me at a party this past month than you know that I probably prepared this appetizer. The flavors of seasoned cream cheese, salty bacon and spicy jalapeño peppers make this the perfect bite sized snack!!! 
To prepare stuffed jalapeños can be a little time consuming….but it is truly an easy recipe! Make sure that you have some cheap plastic gloves on your grocery list…..definitely important when you are cleaning out the jalapeños.  I usually line a large cookie sheet with aluminum foil. It helps to collect the grease during baking and makes clean up easier.  

Bacon Wrapped Stuffed Jalapeños 

25 jalapeños, sliced in 1/2; remove stem & seeds
1 package regular (mild) sausage
1 package (8 oz.) cream cheese, cut into chunks
paprika
pepper
garlic powder
Italian Seasoning
1 package of bacon, cut into 1/3's
box of round toothpicks

Preheat oven to 400 degrees. While wearing plastic gloves; wash jalapeños, cut in half and remove stems/seeds….and then set aside. In a large skillet cook package of sausage until done. Turn to low heat and then stir in chunks of cream cheese and add seasoning (paprika, pepper, garlic powder & Italian seasoning) to taste.  (I usually add a few dashes of each) Remove from heat when all ingredients are blended together. Using a small spoon stuff each 1/2 of jalapeño with the cream cheese filling. Wrap 1/3 a slice of bacon around the stuffed pepper and secure with a toothpick. Continue filling and wrapping until all jalapeños are done and then place on a foil lined cookie sheet. Bake for 30 minutes or until bacon is crisp and done. Serve immediately and enjoy!!!
This delicious appetizer is worth the work!! They never last long anytime I bring them to a social gathering. It always seems to be a surprise whether I happen to buy hot or not so hot jalapeños….it just depends on the batch at the grocery store. Even the spicier jalapeños seem to be balanced out with the cream cheese and bacon. Either way these will be the hit of any party!!! 

Tuesday, May 6, 2014

Million Dollar Spaghetti

I've made different versions of this casserole for years now. While surfing Pinterest recently the name "Million Dollar Spaghetti" jumped out at me. One look at the list of ingredients and you can tell this is a delicious casserole perfect for serving dinner guests. It is always nice to have a great Italian casserole in your recipes files!!!
Of course I did adapt it a little to my own preference such as using Italian Sausage instead of hamburger meat. I also used an Italian Five Cheese Blend of shredded cheese instead of shredded cheddar cheese. 
Million Dollar Spaghetti
adapted from the blog Recipes We Love

1 pound Mild Italian Sausage
1 jar spaghetti sauce
1 (16 oz.) package of spaghetti
8 ounces cream cheese, softened
16 ounces cottage cheese
1/4 cup sour cream
1/2 stick butter, thinly sliced
1 (2 cup) bag of shredded Italian Cheese Blend

Cook Italian Sausage in a medium skillet until done.  Stir in spaghetti sauce with cooked sausage. In a large pot, boil spaghetti noodles according to package directions until firm; drain.  In a large bowl combine cream cheese, cottage cheese and sour cream until well blended. Layer 2 tablespoons of sliced butter in the bottom of a greased 9 x 13 inch baking dish. Put half of the cooked spaghetti on top of the butter slices. Spread all of the cream cheese mixture on top of the spaghetti.  Top with the remainder of the spaghetti and put the last 2 tablespoons of butter across the top. Spread the meat mixture evenly over the top of the casserole. Bake at 350 degrees for 20 minutes and then sprinkle with 2 cups of cheese and return to the oven for another 15 minutes.  

Make sure to pin this recipe and save it in your files!!! The next time you need a casserole for friends coming over for dinner or your family is in town for a visit…..make this dish!!! It goes along well with a loaf of French bread, a crisp green salad and your choice of veggie. It also reheats perfectly for a quick meal the next day. If you want to freeze this casserole, double wrap it in heavy duty foil with the directions written on top. Thaw overnight in fridge and top with cheese the last 15 minutes of baking as directed. You could also make this recipe in two 8x8 inch pans; 1 to eat now and 1 to freeze for later. It would be a delicious meal to deliver to a new mom or a family in need. Enjoy!

Thursday, May 1, 2014

Strawberry Lemonade Cake

Easter weekend was filled with a large base Easter egg hunt, dyeing Easter eggs, a trip to see my Grandma and cousins, and another road trip to my parent's house for a big Easter dinner. Amidst all of the activities I found time to throw together an easy dessert recipe that is the perfect combination of sweet and sour!!! Actually my nine year old daughter helped me prepare the cake and frosting. 
Truthfully any type of cake mix would work for this dessert……but what really makes this cake is the delicious fluffy tart frosting!!! The ingredients of the frosting require this dessert to be stored in the refrigerator. That actually makes this cake extra special because the cool lemonade zing pairs beautifully with the sweet marshmallow cream and strawberry flavor. 

Strawberry Lemonade Cake

1 box Strawberry Cake mix (plus oil, water & eggs as directed on the box)
1 (8 oz.) package cream cheese, softened
1 packet (0.23 oz.) of Kool-Aid Lemonade
1 container Jet Puffed Marshmallow Creme
8 oz. container of Cool Whip

Prepare cake according to directions on the box and bake in 2 (9-inch) greased round cake pans. Turn baked cakes over on cake racks and allow to cool completely.  In a large bowl, beat cream cheese, 1/2 packet lemonade mix and marshmallow cream until smooth. Add in more lemonade mix to taste; add entire packet if you like it more tart. Then mix in Cool Whip until completely smooth.   Place one cake on serving stand; spread a layer of frosting on top. Place second cake on top of first cake and use the remainder of frosting to cover entire cake (top and sides). Refrigerate until ready to eat. 


If you wanted to add more pizazz to this cake, then simply add some sliced strawberries to the top.  Also, if you choose, you can leave the lemonade packet out and enjoy the cream cheese marshmallow frosting on its own. Words can't describe how yummy the creamy fluffy frosting tastes. It is the perfect treat for the upcoming warmer months of summer.  

Tuesday, April 29, 2014

Cheesy Pesto Bread

One of the best things about this recipe is that it complements almost any dinner!!! From a fancy Italian dish to a down home casserole this bread makes the perfect appetizer or side. It is surprisingly easy but looks like you spent lots of time preparing it.  The flavors are mild and cheesy which makes this very family friendly.  
Cheesy Pesto Bread

1 loaf French bread
1 container of prepared Pesto
1 package of sliced Mozzarella cheese
season to taste…..Mrs. Dash Italian Medley, Garlic powder, grated Parmesan cheese

Preheat oven to 350 degrees. Cover a cookie sheet with foil and lightly spray with Pam. Slice bread in the center into two pieces and place on the cookie sheet. With a long knife, score the bread lengthwise (but don't cut all the way down to the base of the bread) and then cut going the other direction crosswise. You will end up with little squares of bread. Using a small spoon spread the pesto down into the crevices of the bread.  Next tear the mozzarella slices into thirds and push down into the slices of bread. If desired, sprinkle a few dashes of Italian seasoning, garlic powder, salt, pepper and grated Parmesan cheese over the top of the bread. Bake in preheated oven for 10 to 15 minutes until the cheese is melted. 

The possibilities for this bread are endless!!! You could add your favorite type of sliced cheese such as monterey jack, cheddar or smoked gouda. Even a drizzle of melted butter over the bread as it comes out of the oven would be delicious! Serve large slices of this warm and gooey bread to your grateful dinner guests!!! Enjoy!